

Type of the website could be a Business website, Blogging website, or an E-Commerce store. On the website, you will mention all the important pieces of stuff like about the company, what work you guys are doing, showcase the projects, list of products you are selling, etc.
Like others, you have got your amazing website which is created in WordPress. What next?
Most of us will make the website in the native language or in English to can get a good amount of native traffic. But.. Have you thought of making the website available in different languages? So that more people can come to know about your company even if they don’t know your native language or in whichever language the website is built.
I have created a small plugin called WordPress Google Translate to make your WordPress website available in many different languages. This plugin is freely available on WordPress Repository or you can download it from this page.
In this post, we will see how you can use WordPress Google Translate plugin on your WordPress website and translate it into different languages.
I am sure many of you are aware of Google Translate. For those who don’t know, it’s a tool to translate the words in different languages. Same thing I converted into the WordPress plugin so that one can use it on his WordPress website to translate content to different languages.
Install WordPress Google Translate Plugin
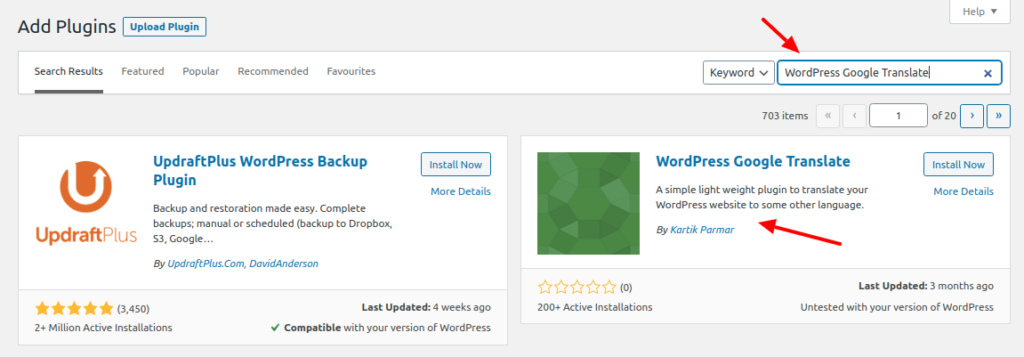
To install WordPress Google Translate plugin on your website, login to admin end of your website and go to Plugins -> Add New and search for WordPress Google Translate and install from the list whose author name is Kartik Parmar as shown in the below screenshot. Click on Install Now and it will start installing the plugin. Once installed, click on the Activate button to activate the plugin.
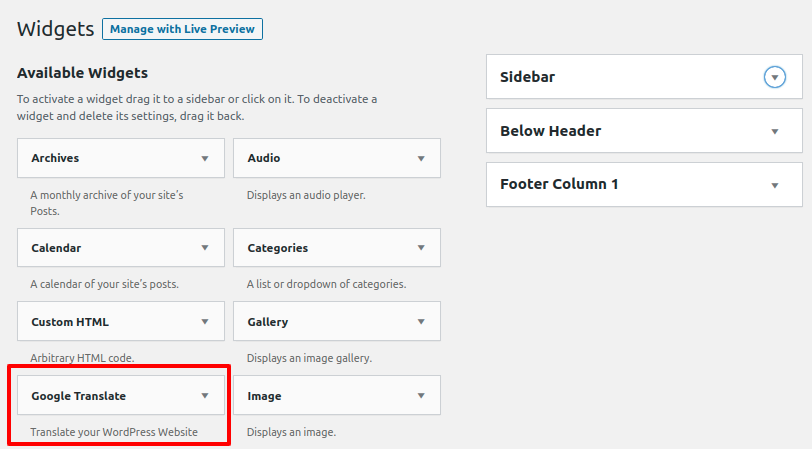
Go to Appearance -> Widget page once the plugin is activated. On the Widget page, you will see a widget called Google Translate as shown in the below screenshot.
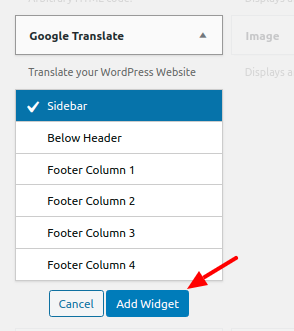
To add this widget to Sidebar, Click on widget and select Sidebar and click on Add Widget button.
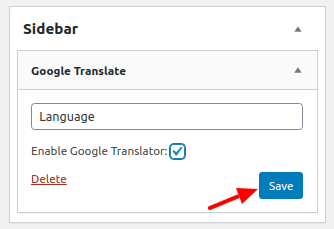
Once added, it will appear as shown in the below screenshot. You can set the title and click on Enable Google Translator option to enable it. Once everything is done, click on Save and Done.
Now visit the front end of your website and you will see the WordPress Google Translate widget in the sidebar of the page as shown in the below screenshot.
Using language dropdown you can select any language you want and the content of the website will get translated into the selected language. Let’s select the French language and the result of the page will be as shown in the below screenshot.
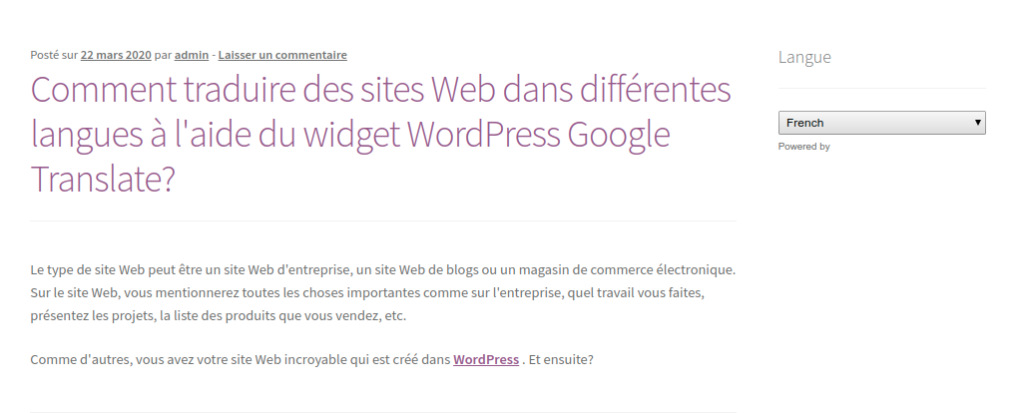
After implementing this on your website, you don’t have to worry if the visitor doesn’t know the language in which the site is. He can simply translate the website into his convenient language using this language dropdown.
Conclusion:
In this blog post, we have seen how this small WordPress plugin called WordPress Google Translate can translate a website in different languages so that your website will be available for a wide range of people. Even there is a language barrier, the visitor will choose to stay on your site as you have given the language selection functionality on your site, and using it they can choose any language they want to see the website content.
Please feel free to comment if you have any questions. If you like this post and the plugin and you want to share your feedback then you can do that on the plugin review link.